You’ve got your topics prepared, your guests lined up and you’re raring to go with your new podcast episode. How can you ensure that your message is heard, though? Low-quality audio can put listeners off and reduce listener retention. This is why it’s important to get a high-quality recording of your podcast. They’ll also save you time in the post-production stage. Check out these 9 podcast audio recording tips and take your podcast to the next level!
1. Use The Right Mic For The Job
I’ll start off these podcast audio recording tips with one of the most important recording tips you’ll ever hear. Use a mic that’s specifically suitable for what you’re recording – not just whatever is highly rated or good value.
Blue Yeti microphones are some of the most common mics that I see in use for podcasters. And yes, the Blue Yeti is an okay mic for the money. Does that mean it’s the best option, or right for every single podcaster in the world? No.
There are two main types of microphones – dynamic mics and condenser mics.
Dynamic Mics
Dynamic mics are robust and can withstand high volumes without distorting. They also have a tight pickup pattern. This means they pick up what’s directly in front of them, but not a lot else.
Examples of Dynamic Mics

Condenser Mics
Condenser mics are more sensitive, they pick up more detail than dynamic mics and normally have a wider pickup pattern. This means that they tend to capture a lot of what’s going on in the room, not just what’s directly in front of them.
Examples of Condenser Mics
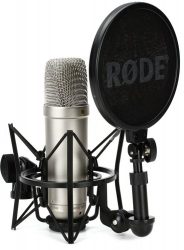
Audio Technica AT2020 XLR Microphone
If you are recording only yourself at home (in a room that is not acoustically treated), a dynamic mic is the way to go. Condenser mics usually pick up too much room sound. Room sound is the reflections of your voice that bounce off the walls and back into the microphone. This makes for a less professional, less intimate and less clear recording. Dynamic mics will mostly just be picking up your voice, making for a more professional and intimate recording.
You may want to consider a condenser mic if you’re recording in a purpose-built studio room, or if you want to record more than one person with one mic.
2. Use a Pop Filter When Recording Podcast Audio
A pop filter (also known as a pop shield or wind sock), is one piece of equipment that’s often missed off the shopping list of a new podcaster. A pop filter is absolutely essential.
A blast of air is launched directly into the microphone when you make ‘P’ sounds (and to a lesser extent, ‘B’ sounds). These blasts of wind get picked up by your mic as a heavy, bassy, windy sound – also known as a ‘plosive’.
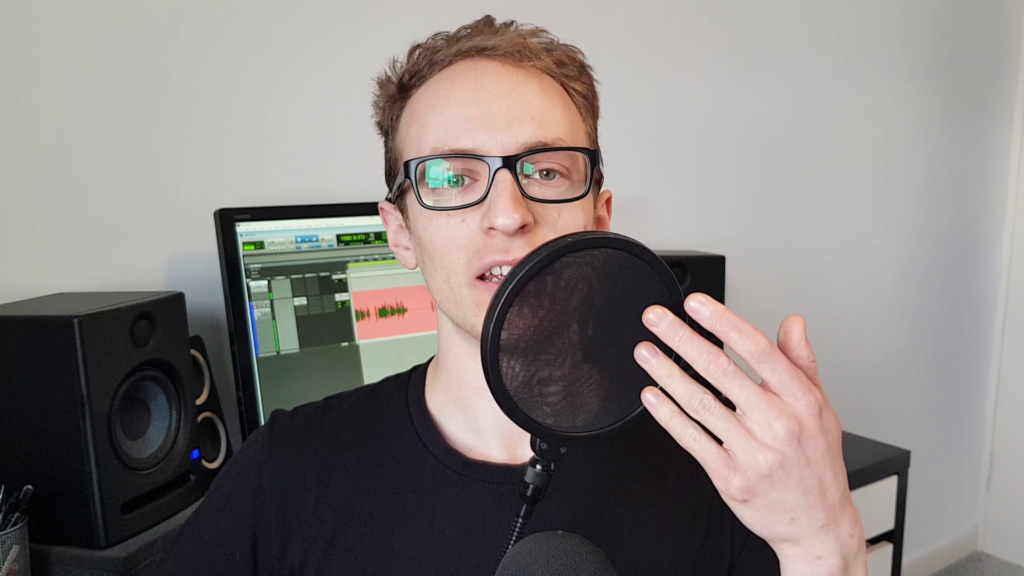
Plosives are very unpleasant for the listener, but a pop filter will prevent them from being picked up on your recording. They can be edited out, but typically only with professional-grade software. In addition, even if they’re edited out, the quality of the recorded word in question is normally negatively affected.
Pop filters aren’t too expensive so it’s definitely worth picking one up if you’re serious about podcasting. If you can’t fit one into your budget, though, try pointing the mic very slightly off-centre to your mouth. This should prevent some of those windy blasts from being picked up.
3. Record Your Podcast In a Quiet Space
The sound of the room that you’re recording in, can be equally as important as the microphone that you’re using.
As mentioned above, any room in your home will have its own acoustic response. For example, a purpose-built home studio with acoustically treated surfaces will likely have minimal echo/reverb. Whereas recording your podcast in your open-plan kitchen diner will likely produce unnatural and harsh roominess that your microphone will pick up during recording.
If you don’t have a purpose-built home studio, consider which room in your house creates the least amount of unwanted ambience. This will likely be a smaller room. Soft furnishings such as a sofa or bed will also help to absorb some reverberation. You can also consider investing in acoustic treatment – even budget, foam panels are better than nothing (as long as they’re relatively thick).
Perhaps you’re using a dynamic microphone to mitigate most of the background noise, but it’s still not ideal to record anywhere that noise will be distracting to you. Whether that’s a noisy dryer in the background, or your kids zooming around while you Zoom. You may not have many options at home (which I completely understand), so just do the best with what you have.
4. Pick the Right Settings
You may be asked a few questions relating to audio settings when you load up your recording software to record your podcast (particularly if it’s the first time). Two of those settings will likely be sample rate and bit depth. It’s important to set these correctly before you start recording so that you can ensure great quality without using up too much processing power and disc space.
Sample rate is how many ‘snapshots’ (or ‘samples’) of the audio are taken per second to turn your recorded audio into a digital file. The higher the sample rate, the more samples are taken, and the more ‘accurate’ the digital file will be. If the setting is too low, the quality of the recording will be poor. This doesn’t mean that you need to set it at the highest possible setting, though. A setting of 44.1 kHz (or 44100 Hz) is perfectly sufficient to record very high-quality audio for a podcast. Any higher and you’ll be working your computer harder for no real benefit.
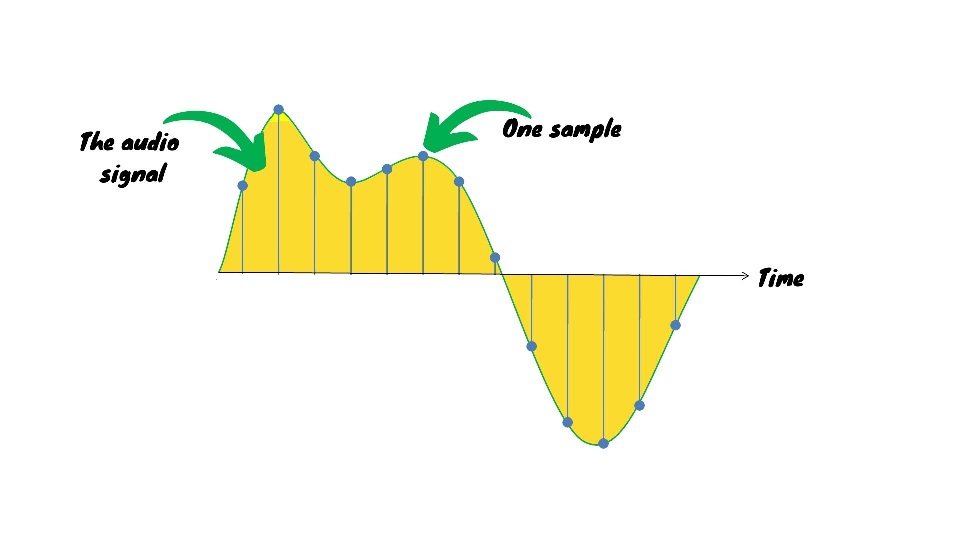
Bit depth affects the dynamic range – the difference between the loudest and quietest possible levels that your computer can digitize. Again, too low and you’ll be losing quality, but there’s no need to go too high either. 24-bit gives you more than enough dynamic range. If you’re short on disk space, you’ll be fine to go as low as 16-bit for a podcast recording.
Take a look in the software’s audio settings in the ‘Options’ or ‘Preferences menu and check if you need to make any changes.
5. Check Your Levels
It’s important to check your mic levels before you start recording. If you’re recording using dedicated audio software (a digital audio workstation), you’ll see a level meter that moves up and down relative to the level of audio signal that’s passing into your computer. If the audio is too loud, it’ll hit 0 decibels (dB) and can cause some nasty distortion, or ‘digital clipping’. This can be very unpleasant for the listener and needs to be avoided.
To avoid digital clipping, speak loudly into the mic, and reduce the input level on your mic or audio interface if the level is getting anywhere near the ‘red zone’ of your level meter. A good rule of thumb is to set your levels so that your meter is reaching no higher than around -12 dB when you’re speaking. Be careful not to record super-quietly either though, as any guests may struggle to hear you, and it could cause issues during the post-production stage.
If you’re recording into a USB microphone and through video calling software, you can test the levels in the audio settings menu and ensure they’re not reaching near the top of the meter.
6. Hire a Podcast Editor
Podcasting takes a lot of work. There’s planning each episode, approaching and booking guests, research, recording, editing, promoting… Some enjoy doing all of this themselves – they enjoy the whole process. Others would rather just get their message heard and grow their podcast as quickly as possible. If you’re one of those podcasters, it may be time to hire a dedicated editor.
Hiring an editor not only can save you hours every week that you can reinvest back into planning, writing and talking (the stuff that you actually signed up for when you started a podcast), but it also takes away some of the stress by removing a whole aspect of the process.
You won’t have to worry about any mistakes or extraneous sounds that might occur when you’re recording. And you’ll know that your work is done once you’ve finished recording. Someone else will take care of the rest of it for you. In addition, a professional editor will ensure that your podcast sounds the best that it can, so it’ll stand shoulder to shoulder alongside the biggest podcasts on the web.
Click here to get in touch and see how much of a benefit it can be.
7. Make a Test Recording
There have been far too many situations where a podcaster has expressed to me their disappointment in a recording that they’ve made. Situations where they’ve lined up the perfect guest and recorded an hour of fantastic content, only to realize afterwards that there’s a strange buzzing noise all the way through the recording! Or they had the mic pointing the wrong way and their audio is quiet and distant. I always do my best at saving these recordings during the editing/mixing stage, but there are certain audio issues that sadly can’t be fixed.
Always take a quick test recording before you start recording your podcast episode and listen back to ensure it sounds clear and strong. You can check your audio in under a minute and avoid potentially wasting a whole recording session.
8. Wear Headphones While Recording Your Podcast
Headphones or earphones are another essential piece of kit for recording your podcast. You could record your podcast while listening to your guest, or yourself, playing back through your computer speakers. The problem with this is that the audio coming out of your speakers will go back into your microphone and record a second copy of the dialogue. This will create a nasty ‘echo’ effect and ruin your recordings. Always keep your headphones on and ask any guests to do the same!
9. Record Host And Guest Separately And Locally
Sending audio across the internet negatively affects the audio quality. If you’re recording your guest on Zoom or another video calling software on your side, you’ll be capturing audio that has travelled across the world. This makes for a more amateur-sounding podcast.
Ideally, all speakers would be recording their voices locally onto their computers. They can then save this audio in full quality, without any signal degradation, and then these recordings can be sent to the editor.
If your guests don’t have the facilities to do this, consider using a web service such as Zencastr. Zencastr (and other, similar software) lets you invite guests using a link, and each guest is recorded to Zencastr at high quality, without much signal degradation. The files can then be downloaded and edited and should sound far better than using your Zoom audio.
If you do have to use the audio from your video calling software though, at least ensure that you’re recording all the speakers onto separate tracks though, so they can be edited separately.
And there we have it, our top 9 podcast audio recording tips to help you to get the best-sounding podcast possible. Get your podcast heard in its best form! Want to learn more? Check out our full guide on recording your podcast.
Happy podcasting!